Welcome!

Ambrose Hawkins
Gameplay Programming and Project Management
About
Hello World!
My name is Ambrose Hawkins, and I'm a game developer in Madison, Wisconsin focused on gameplay programming and project management. I recently graduated Summa Cum Luade with a B.S. in Game Programming and Development from Southern New Hampshire University in April 2025.My best work is in Unreal Engine 5 (C++), but I am comfortable with many languages and frameworks, including Unity (C#), Pygame (Python), Java, and MATLAB. Prior to becoming a game developer, I pursued Computational Physics as an academic career and am well-versed in Object-Oriented Programming, Linear Algebra, Multivariable Calculus, and Ordinary Differential Equations.I have worked in a variety of team environments, including leadership positions. I believe that understanding, compassion, and inclusion are key to fostering workplaces where team members can thrive both collectively and individually.In addition to my studies, I am also a Moderator and Peer Support Mentor at The Dev Pit, a student-led club providing class resources and study support for CS, IT, and Game Dev students. We strive to create a welcoming, inclusive environment for technology professionals of all skill levels, abilities, and backgrounds. We opened The Dev Pit Studio, for which I am currently acting Producer, to help the students we serve to gain game development and project management skills through game jams and other development projects.
Fun Facts
My favorite games are Dark Souls, Fire Emblem Awakening, and Terraforming Mars.I am severely allergic to cats, which does not stop me from severely loving all of them.
Portfolio
Take a look at what I've been cooking up! (Some project pages are still under construction. Stay tuned!)
Game Development
Aura Top-Down RPG w/ GAS [Coming Soon]

Graphics Programming Showcase

Zero Stand

Hellebore [Demo]

Everhill Manor

Key Bearer's Quest

Treasure Detector

Sandbox Survival Game

Graphics Programming Showcase
UE5 | C++ | Proc Mesh | Scene Capture | DMI | Niagara
Assets used:
Find the source code here.
This gallery, implemented using C++ in Unreal Engine 5, showcases the concepts learned in GAM 415: Dynamic Material Instances, Procedural Meshes, and Scene Capture Components.
Process
When developing this showcase, I started by developing each feature separately. My goal was to demonstrate proficiency in the graphics programming concepts taught in the course I was taking by presenting them in a simple and interactable way.
I used Unreal Engine 5 and C++ with JetBrains Rider to bring this idea to life. The initial prototype (which is presented in the embedded YouTube video) focused on creating the basic mechanics of all three concepts: dynamic splatter textures, particles, and projectile materials; procedural meshes; and portals utilizing scene capture components. This phase involved a lot of experimentation, especially with the Niagara particles that I used for the splatter effect and the linear algebra involved in creating a realistic portal viewing experience.
Lessons Learned
Through the development of this artifact, I gained valuable insights into graphics programming. One of the biggest takeaways was the importance of math and logic fundamentals in graphics programming. Going into this project, I expected that there would be a comparable amount of mathematics to other game programming areas I had been exposed to, but between the calculations necessary to create the procedural mesh and the linear algebra required for the portal mechanics, a solid understanding of math and logic are definitely required.
I also learned that it's important to consider how different classes might interact with each other early in development. If I were to approach a similar project in the future, I would plan ahead for interactions I am planning to create in the future, especially when UI Widgets will be involved, whether that looks like creating interfaces or event dispatchers.
Challenges
One of the biggest challenges I faced was implementing the logic for allowing the player to change the procedural mesh using a menu. Despite successfully changing the mesh parameters in the code, I was unable to regenerate the mesh. To solve this, I looked up the methods I was using to alter the mesh and found that I was not using the correct function for my use-case, in which the new mesh may not have the same amount of vertices as the old mesh. I decided to delete the old mesh and generate the new mesh instead. This is less efficient, but I did not have any noticeable drops in performance during gameplay using this method.
Feedback
Throughout the process, I received feedback from my professor and playtesters that helped me refine the artifact. Much of the feedback I received was based on usability: the program included no UI or menu and was difficult to exit, and it was easy for the player to get out-of-bounds by walking off of the procedural mesh. Some of my playtesters were also confused about the purpose and identity of the procedural mesh.
Improvements
Once the core mechanics and design were solid, I focused on polishing the artifact. Based on the feedback I received, I made changes such as implementing a UI, creating an interactable station for the procedural mesh, and making the mesh out-of-bounds terrain for the player. I conducted several playtests to ensure that these changes improved usability and understanding.

Menu Button Prompt

Pause Menu

Interact Prompt

Edit Terrain Menu


The Future
While I am happy with the current state of the showcase, there are many changes and features I am planning to implement in the future that will further distinguish my abilities in graphics programming:
Implement an AI Actor which shoots projectiles as well.
Use procedural mesh component to create targets which shatter or slice when hit.
Add Niagara particle effect to the gun muzzle which is also the same color as the projectile.
Create a mini map widget using the scene capture component.
Zero Stand
UE4 | Blueprints | Landscape Materials | User Widgets
Assets used:
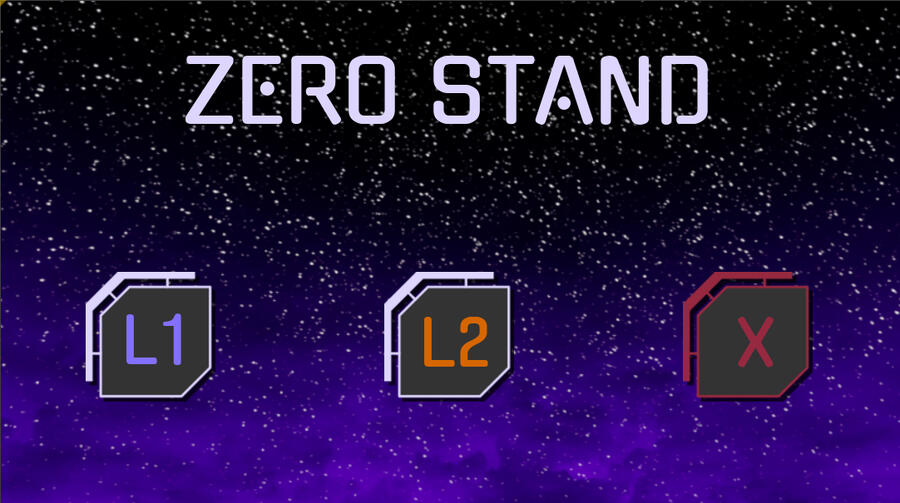
Zero Stand is a third person shooter created in Unreal Engine 4 with the objective of hitting all targets in each level within the designated time limit and a restricted number of projectiles. The targets utilize a dynamic material to demonstrate "Hit" status.
Process
When working on Zero Stand, I began by creating the level geometry in both levels, a landscape and landscape material for Level 1 and BSP brushes for Level 2. My objective was to familiarize myself with Unreal Engine, as this was the first game development project I undertook as a student at SNHU.
To bring this project to fruition, I utilized Blueprints in Unreal Engine. In the early stages, I focused on learning how to use Blueprints. I was already familiar with C++, C#, Java, and Python, but I had never used a visual scripting language before, so it took some getting used to. Luckily, Epic Games has robust documentation about Blueprints on their website, so finding the information I needed was quick and easy.
Lessons Learned
Developing Zero Stand provided me with valuable experience in using Blueprints and creating materials. One of the most important lessons I took away was the value of documentation. Having access to sufficient documentation was key to the success of this project, and now I create documentation for all systems I develop, even if they are for my own use.
I also discovered the importance of project organization. Because this was my first game development project, I did not use a consistent file structure, and I was not careful to only import assets that I would be using directly in the project. When I reopened the project at the end of my degree, I found many GBs of unused assets and an in-navigable file system, which I did my best to fix, but it was a nightmare to correct. Since this experience, I've been much more careful to plan my file structure out ahead of time (which is much easier now, as I've settled on a system that works for me and is adaptable for most of my projects) and remove assets that I no longer need as I go instead of letting them clutter my project.
Challenges
One of the biggest hurdles I encountered was figuring out how to make the targets reflect their hit status in a way that is obvious to the player, especially since I did not yet have any experience creating HUDs in Unreal Engine. To address this, I found an emmisive material in the engine starter content and instanced it, allowing me to change the emmisive color at runtime.

Feedback
Feedback from my professor played a key role in refining the artifact. In the prototype, the game did not exit the level and return to the menu until the level's timer ran out, regardless of how many targets had been hit. A lot of the feedback I received revolved around making the game loop more transparent, especially with a graphical representation of the timer and how many shots the player has left.
Improvements
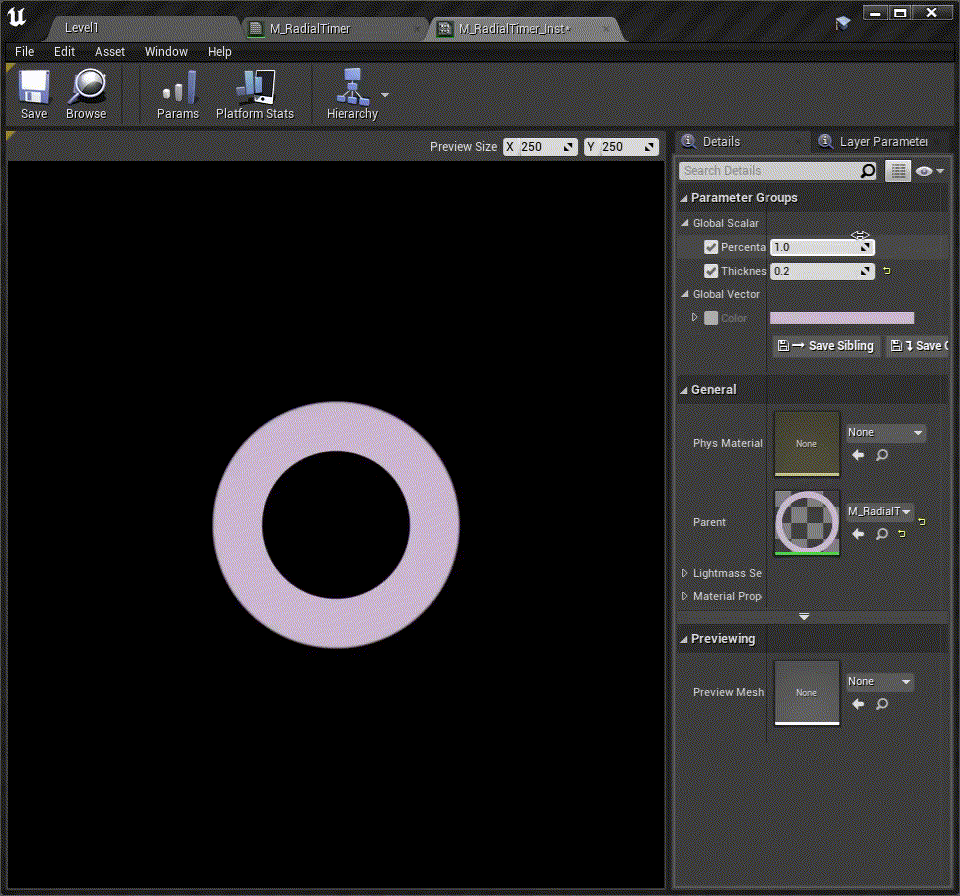
With the core functionality in place, I shifted my focus to polishing the artifact. This involved incorporating the feedback I had received. For the radial timer widget, I created a Material Instance which is easily updated via a Percentage parameter.
I also created logic to end the level when all the targets have been hit, and endgame widgets that have different text depending on the game over condition, to make the game more understandable.

AbilityForge (PoC)
UE5 | Documentation | UML | Gameplay Ability System
AbilityForge is a modular, extensible gameplay ability system (GAS) designed for turn-based strategy RPGs made using Unreal Engine, inspired by titles like Fire Emblem. It supports the dynamic equipping and unequipping of gameplay abilities and stacking effects in predefined ways. Like the system itself, the development process is also modular: each component of the system is developed independently, which promotes reusability and scalability. Polymorphism is employed where appropriate in order to keep logic encapsulated and clean. For example, polymorphism allows for a common interface across ability types. Throughout development, a test-driven approach will also be implemented to maintain stability and catch potential conflicts early. The target audience of this system are game designers seeking a reusable system for ability management across multiple characters, as one of the priorities of AbilityForge is to allow designers without C++ expertise to modify and extend abilities through Blueprints. This prototype will showcase gameplay programming principles, especially through its use of encapsulated, scalable components.
Framework
AbilityForge will consist of the following components:
Stats Component - Houses the character attributes and defines the rules for how each attribute is derived. Each character has one Stats Component.
Ability System Component - Manages the Gameplay Abilities that the character currently has. The amount of Abilities the character is allowed to possess is defined by this component. Each character has one Ability System Component.
Gameplay Abilities - These are the ability effect containers that are managed by the Ability System Component. They contain one or more Ability Effects that affect the character’s stats during gameplay. This pattern allows designers to create Abilities that provide more than one Effect.
Ability Effects - The Ability Effects are the components of each Gameplay Ability that determine how it performs. There are two types of Ability Effects: Passive and Active. Passive Effects activate when the Gameplay Ability is equipped to the Ability System Component and perform one modification that lasts until the Ability is unequipped. Active Effects are activated by the player during gameplay and only last a specified number of turns. For example, consider a Gameplay Ability which has two effects: it increases the character's strength by 2 points and allows the character to boost a nearby character's strength once per turn if the player chooses to do so. The first effect is passive because it is passively applied while the ability is equipped, but the second effect is active because it requires an action initiated by the player to activate.

Class Diagram

Sequence Diagram


Development Process

Development Phases

The development process is conceptualized as modular and test-driven. Validation of each component and process is key. For example, during the Core System Implementation phase of development, unit tests will be created to verify that Base Stats initialize correctly, Stat Modifiers are applied and removed as expected. During the Playable Prototype phase, sample Abilities will be created to demonstrate the system. Examples of potential sample Abilities include a permanent Strength buff or a shield that boosts Defense for a single turn. This phase is also when UI integration will be developed, to showcase the dynamic display of changes to character stats.
During the Testing phase, special attention will be given to edge case handling. This includes verification of behavior when rapidly equipping and unequipping abilities and making sure that abilities with conflicting Stat Modifiers interact in predictable ways. For abilities that apply conflicting Stat Modifiers—for example, one ability that adds +10 to defense while another subtracts 5—the system will resolve these conflicts using predefined rules. Specifically, Stat Modifiers affecting the same stat will either be combined additively or applied in a set order based on priority. This approach guarantees that the final effect on a character’s stats is both deterministic and transparent to designers, ensuring consistent gameplay outcomes. Once the testing phase is completed, the system will be released to testers and iterated on based on feedback.
Defense
This development process is ideal for AbilityForge because it emphasizes modularity and comprehensive testing. By breaking the implementation down into different phases, each component is developed independently before integration. This minimizes potential issues. For example, separation of the Player Stats Component and Ability System Component into distinct pieces separates the concerns of the system (handling stats and equipping/unequipping abilities) and makes it easier to debug and extend by isolating issues to a specific component. A modular approach allows potential new features to be incorporated later, such as additional ability types. The test-driven process mitigates risks by integrating testing and validation throughout the development cycle instead of saving testing exclusively for the end. Test-driven development will also help ensure that existing functionality remains intact as the system evolves, which is crucial when development of the main systems is broken down into phases.
Research
One of the main points of research that I did was learning about how gameplay ability systems are commonly conceptualized. For example, it became clear to me that the option to have multiple effects within one ability was common enough that it should be considered in the development of this system. It was somewhat difficult to find specific examples of UE projects that used their own Gameplay Ability System because if you search for “Gameplay Ability System,” you will always get resources on UE’s built-in system regardless of the keywords used. Due to this, I actually looked for tutorials and info for other engines and modified ideas to make them work in UE5. Some resources I used while synthesizing my GAS include Creating an easy Ability System in Unity and the SRPG Studio documentation.
Problem Solving
The design process proceeded smoothly; however, there are a few potential pitfalls to keep in mind for future development. The system relies on event hooks to automate certain processes, which makes development easier for the end-user, but has the potential to make our debugging much harder. If multiple systems are subscribed to the same event, it can become unclear which system is causing an undesired outcome. This can be mitigated with a clear event flow and documentation.
Hellebore [Demo]
UE4 | C++ | Enemy AI | Azure DevOps | Git | Jira
Get the playable demo for free at itch.io (Does not include Forgotten AI)
Find the latest source code updates here (Includes Forgotten AI)

Main Menu

Credits Screen


Hellebore [Demo] is a demonstration of shaders and mechanics to be used in a future narrative-based single-player RPG for the PC. It features Behavior Tree controlled enemies, resource handling, and dynamic lighting as the main health and gameplay mechanic. It was developed over the course of 7 weeks by a volunteer student team of 6 for a game jam. I was the producer and gameplay programmer for this project.
Process
When developing Hellebore, I started by planning out our development phases. Because this was a longer game jam, my goal was to use it as an opportunity to go through a more structured development cycle.

Development Timeline

I used Jira to establish the project's timeline and delegate tasks during the Design and Production phases. Confluence was also utilized during the design process to create the Game Design Document and keep notes from our semi-weekly meetings. The demo was developed using Unreal Engine 4.27 and JetBrains Rider. For version control, we used a Git LFS repository hosted on Azure DevOps.
Lessons Learned
Through the development of this artifact, I gained valuable insights into project management. One of the biggest takeaways was the importance of establishing capacity early on to prevent overscoping. While I understood that there were limitations on how much a student volunteer team could accomplish within 6 weeks which spanned finals and winter break, I still severely underestimated the likelihood of certain threats occurring during my initial risk analysis, such as team members leaving during the project for various reasons. Even with better planning, there likely would have been scope changes, but not nearly as drastic.
I also learned that it is important to anticipate accessibility needs early and plan accordingly. Accessibility was my key consideration when it came to selecting video conferencing software and other tools, and having these systems in place from the beginning allowed collaboration to go smoothly. Communicating early with individual team members about how their needs were being met enabled them in feeling confident that they were valuable members of the team and resulted in higher rates of participation than in some of my previous team projects. This is a practice that I will be sure to take with me into the future in both my professional and personal relationships.
Challenges
One of the biggest challenges I faced was creating the logic for the enemy's ChasePlayer sequence. The enemy's movement was very choppy, which was especially noticeable when the Player would turn. To fix this, I implemented a Cooldown on the ChasePlayer sequence so that it would refresh its reference to the Player's location much more often. In the GIF labelled "After" below, the cooldown is set to 0.2 seconds, and the enemy's movement is much smoother.

Before

After


Feedback
Throughout the process, I received feedback from my team members and playtesters that helped me refine this artifact. One of them noticed a bug where the enemies would "hesitate" before beginning their patrol sequence after spawning into the world. However, most of the feedback had to do with features that had not made it into the original demo, such as enemy/player interaction and an expanded map.
Improvements
After the jam was over, and the original demo was uploaded to itch.io, I focused on refining some of the features that did not make it into the original jam submission. I opened up the blocked off section of the map and used it as an area to demo the AI behavior. Because of this change, I also created special geometry in the level to keep the enemies out of safe zones. I did this by creating a special physics layer for the enemies and setting collision on blocking volumes to block the enemies while ignoring the player. The enemies do return to their spawn point when the player gets too far away, but this felt like a good extra measure to keep the safe areas enemy-free.
Key Bearer's Quest
UE4 | Blueprints | Enemy AI | Project Management
Find the source code here.
Find the postmortem here.

Key Bearer's Quest is one level of a 2D platformer created using Blueprints in Unreal Engine 4. It was developed over 5 weeks alongside 4 other student developers for GAM 305 at SNHU.I was the Project Manager for this team, though due to the team's size, we each took on various roles. In addition to managing the project and repository throughout development, I acted as AI programmer, gameplay programmer, and QA tester as needed.
Sandbox Survival Game
UE5 | C++ | UI Widgets | Stat Management | Building Mechanics
(Note: I am currently working on a video which goes into detail about the actual code behind this project.)
Find the source code here.
Treasure Detector
UE4 | Blueprints | Destructible Mesh | GIT Bash
Find the source code here.
Writeup coming soon.
The Secret of Everhill Manor
Python | Jetbrains Pycharm

Find the source code here.
The Secret of Everhill Manor is a text-based game played in the terminal which was developed using Python for an Intro to Programming course. The player must explore a mansion to look for key items to unlock the door to the study, where a final confrontation takes place. The win/lose conditions depend on how thoroughly the mansion was explored and which items were acquired.OOP principles and frameworks were outside of the scope of this course, so the program consists of a single file containing a game loop, though I did reduce redundant code by creating helper functions. Because this wasn't my first brush with text-based games, I endeavored to go beyond the assignment requirements by creating many different endings, of which there are 5.In the future, I want to come back to this game and remake it in either Java or C++. The current game uses a 2-layer dictionary to categorize the rooms and items, and I would like to instead create classes for these objects. I think this would open up more functionality and allow for better inventory handling and room navigation. Because there is only one file, all of the game text is also hard-coded into the game, and I plan to update it to instead read from external text files, which would clean up the code considerably.
Contact
You can contact me through the form on this page, email, or LinkedIn!
Game Dev Inquiries: [email protected]
LinkedIn: ambrose-cvetko